In this lesson we were taught how to remove blemishes, to make your skin look flawless and also changing features of a person such as eye colour. I have used the woman above as my model. To make my model perfect I used the program Adobe Photoshop. I performed the steps below to achieve the above image:
- Duplicated the layer so if I go wrong I can go back to my original layer so it is for back up use.
- Use spot healing tool to remove all marks and spots from the toolbar on the left side which looks like this:

- Blur the image to make her face look clearer. the toolbar at the top filter>>blur>>gaussian blur
- Went to the duplicated layer to rub of the blur of certain features such as eyebrows, eyes etc using the rubber tool in the left side.
- Rub out features you want to be sharp and stand out
- I made a new layer as I want to colour the eye and her hair colour. It is also easier to edit as when you want to edit you can go to the layer you want to edit instead of editing everything
- I picked the eye colour which I wanted from the toolbar
- Then went on the brush tool, I picked the size of my brush so it fits the pupils of my model
- It then looked unrealistic and too bright for a eye colour
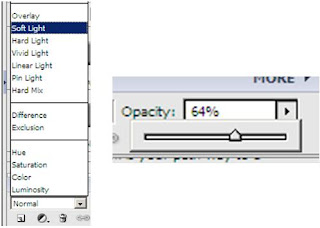
- To make it realistic I went to the right hand side bar on top of my layers it says normal with a arrow pointing downwards and there was a variety of effects to pick from I changed from normal to soft light
- However it was too sharp for a eye colour so I changed the opacity for final touch
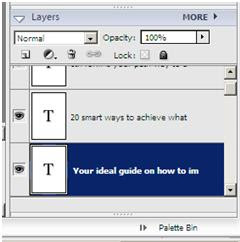
- Print screen below showing where and what to do


Producing H&M magazine cover


To do this I duplicated my layer and I then picked the colour I wished for which was yellow. I coloured over my image using the brush tool on the toolbar. To get the effect I wanted I used overlayer which is on the right hand side toolbar layer. I then got the H&M sign from google and croped the background out by using the magic wand tool. I than copied it to my image and placed it on the right hand side bottom corner. I used one colour as H&M keep there adverts simple but funky and also the H&M logo is kept to minimum.
This is a comparison of a before and after cloning. Cloning is a tool where you can remove unwanted things from your image. I firstly selected the clone stamp tool from the left side toolbar. I then holded down on Alt and clicked on the colour I wanted to clone. I then rubbed out the 'St Marylebone' sign using the grey colour I cloned. I also removed the builder from the picture and the security camera. I also made a student shorter than usual. This cloning tool will help me while I make my magazine cover as I can remove unwanted things from my image.
Model image for my magazine cover

This is my magazine cover image. I chose a young model to relate to the target audience. My model is meant to represent success and achievement as she is smiling which gives a positive atmosphere. The background is white so it would be easier for me to change the background on Adobe Photoshop. I will also crop out the white space left as she is more to the right. As you can see she has a red mark near her eyebrows which I will erase using the spot healing tool. Moreover I will crop out the unwanted hair to make her look flawless. I chose to use this picture as her smile looks natural and realisitic.


